

Connection Templates in rConfig V8 Core
Connection templates define how rConfig V8 Core authenticates, connects, and interacts with your network devices. After reading this page, you can understand how templates work, import community templates, create and edit your own in the YAML editor, and troubleshoot connection problems they cause.
When to use this
Section titled “When to use this”Use connection templates whenever you need rConfig to talk to a new device type, standardise connection behaviour across a fleet, or fix connection failures caused by mismatched prompts, timeouts, or paging. Templates let you define connection parameters once and reuse them across many devices, rather than configuring each device by hand.
Understanding connection templates
Section titled “Understanding connection templates”A connection template is a reusable blueprint that specifies connection parameters, authentication prompt patterns, CLI prompt recognition, command syntax, and behaviour for a group of devices. Define these parameters once in a template, then apply that template to every device of the same type or vendor family.
Templates solve several common problems in configuration management:
- Consistency across the fleet: All devices of a type use identical connection parameters, reducing drift and troubleshooting effort.
- Multi-vendor support: Each template encapsulates a vendor’s CLI behaviour, prompt patterns, and command syntax, so rConfig can talk to diverse equipment.
- Simplified onboarding: Assign a pre-built template to a new device instead of configuring connection parameters from scratch.
- Centralised maintenance: Update a template once (for example a changed timeout) and the change applies to every device using it.
Template architecture
Section titled “Template architecture”Each template is written in YAML, a human-readable data format. A template defines:
- Connection protocol: Whether to use SSH, Telnet, or another protocol.
- Authentication parameters: The username and password prompt patterns (not actual credentials).
- CLI prompt recognition: Patterns that identify when the device is ready for commands.
- Command execution behaviour: Timeout values, paging settings, and command delimiters.
- Privilege escalation: Enable mode access and privilege level commands.
- Vendor-specific handling: Special handling for unique device behaviours.
How templates map to devices
Section titled “How templates map to devices”- One template per device: Each device is assigned exactly one connection template, giving predictable connection behaviour.
- Many devices per template: A single template can be assigned to unlimited devices. This is the main mechanism for scaling configuration management.
- Cross-vendor flexibility: A template labelled for one vendor (such as Cisco IOS) often works with other vendors using similar CLI patterns. Test before relying on it across vendor boundaries.
- No limit on template count: Create as many templates as your equipment requires.
- Portability: Templates use a standard format compatible across rConfig versions, so they can be shared and reused.
Default and community templates
Section titled “Default and community templates”rConfig V8 Core ships with four default connection templates covering common device types:
- Cisco IOS/IOS-XE: Standard Cisco router and switch platforms.
- Cisco NXOS: Nexus data center switching platforms.
- Cisco ASA: Adaptive Security Appliance firewalls.
- Generic SSH: Basic SSH connectivity for Linux/Unix systems.
Although labelled for Cisco, these templates frequently work with Arista, HP/Aruba, Juniper (with modifications), and other vendors using similar CLI patterns. Verify compatibility through testing before production deployment.
The rConfig project maintains an open-source template repository on GitHub with templates across dozens of vendor directories, plus the reference documentation for the template format:
- Connection template legend - every key rConfig reads, its accepted values, defaults, and which protocols use it
- Order of operations - when each key fires during a session
- Contributing guide - naming, headers, and how to submit
- Migration map - old path to new path, if you are following an older link
The directory list is not a list of supported vendors. If your platform is not present, the repository’s starter template is the place to begin.
Templates main view
Section titled “Templates main view”The Templates interface provides centralised management for your template library. The main view lists all templates in a searchable, sortable table.
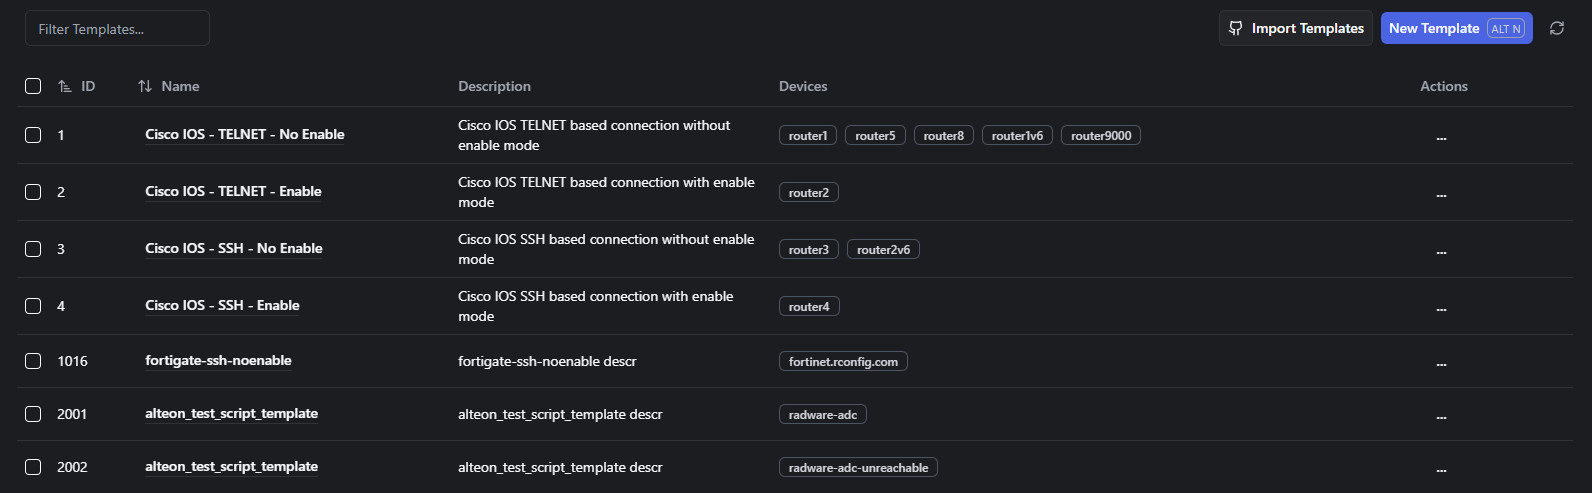
From this view you can:
- View all configured templates with their key metadata.
- Filter templates by name or protocol.
- Add a new custom template.
- Import the community template repository to local storage.
- Edit or delete existing templates.
- Assign templates to test devices for validation.
How to import community templates
Section titled “How to import community templates”Importing community templates is a deliberate two-step process. First you download the repository to local storage on the server, then you import the individual templates you want into your library.
Prerequisites
Section titled “Prerequisites”- The
gitcommand available on the server or in your container. See Docker setup if you run rConfig in containers. - The storage directory writable by the web server user.
- Access to the Templates interface under Inventory → Templates.
Step 1: Download the community repository
Section titled “Step 1: Download the community repository”- Navigate to Inventory → Templates.
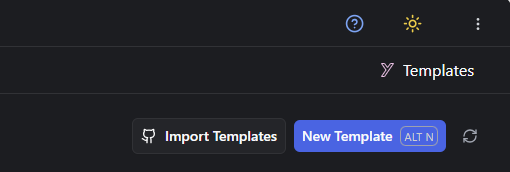
- Click Import Templates (the button with the GitHub icon).
- rConfig clones the repository into local storage under
storage/app/rconfig/templates/rConfig-templates. - Read the success message confirming how many template files were downloaded.
At this point the templates are staged on disk but the Templates list is unchanged. Nothing has been added to your library yet.
Step 2: Import individual templates into your library
Section titled “Step 2: Import individual templates into your library”- Click Add Template, or edit an existing template, to open the YAML editor.
- Click Choose Template to Import (this appears once the repository has been downloaded).
- Select a vendor folder, then select a template file from that vendor.
- Click Apply to load the selected template’s YAML into the editor.
- Review or adjust the template name and contents.
- Click Save to add the template to your library.
Each save creates one template record. Repeat for every community template you want. Because you save them individually, you keep full control over naming and content, and existing custom templates are never overwritten.
How to create and edit templates
Section titled “How to create and edit templates”Template creation and editing happen in rConfig’s integrated YAML editor, which provides syntax highlighting and structured formatting.
Prerequisites
Section titled “Prerequisites”- Access to the Templates interface under Inventory → Templates.
- A non-production device available for testing the template before deployment.
- Console or out-of-band access to that test device in case a connection test locks you out.
- Navigate to Inventory → Templates.
- Click Add Template to open the YAML editor with a blank template.
- Enter a descriptive template name indicating the vendor or platform.
- Specify the connection protocol (SSH, Telnet, and so on).
- Set the authentication prompt patterns.
- Configure the command prompt recognition patterns.
- Set timeout values appropriate for the device’s response time.
- Define paging control commands if the device requires them.
- Click Save, then assign the template to a test device and run a debug connection test (see How to test and debug a template).
- Refine the parameters based on the test, then assign to production devices.
- Select the template from the templates list.
- Click the Edit action to open the YAML editor with the current configuration.
- Modify the required parameters, preserving YAML formatting and indentation.
- Click Save.
Template edits affect every device currently using that template. Test changes on non-production devices first, schedule them during maintenance windows, and document the rationale.
The fastest way to build a similar template:
- Open an existing template close to your target device.
- Change the template name.
- Adjust the vendor-specific parameters.
- Click Save to store it as a new template.
This preserves a working configuration while letting you customise for device variations.
YAML editor guidelines
Section titled “YAML editor guidelines”The editor is a direct interface to the YAML configuration file. Follow these syntax rules to avoid errors:
- Comments begin with
#, on their own line or at the end of a configuration line. Default templates include extensive comments explaining each parameter. Keep them or add your own. - Indentation uses spaces, not tabs, typically 2 or 4 spaces per level.
- Quotation marks may be needed on string values containing special characters.
- Key-value pairs use
key: valuewith a space after the colon. - List items begin with a dash and a space,
- item. - Case matters: keys and values are case-sensitive.
Username and password prompts
Section titled “Username and password prompts”The username and password keys define the CLI prompt patterns rConfig watches for during authentication. They specify prompt text patterns, not actual credentials:
username: "Username:" # The prompt the device displayspassword: "Password:" # The password prompt patternDevice credentials are stored separately in the device configuration and provided at connection time. Never put real usernames or passwords in a template.
Timeout configuration
Section titled “Timeout configuration”The timeout parameter controls how long rConfig waits for a device response before declaring a connection failure:
timeout: 15 # Timeout in secondsThe YAML editor does not perform real-time syntax validation. Syntax errors may not surface until template execution, where they cause connection failures. Watch for the common YAML mistakes: extra or missing indentation spaces, missing colons after keys, unmatched quotes, incorrect list formatting, mixed tabs and spaces, and trailing spaces.
How to test and debug a template
Section titled “How to test and debug a template”Effective template development is iterative. Test, read the debug output, refine, and repeat.
- Identify a non-production device for testing, with console or out-of-band access available.
- Navigate to Inventory → Devices and edit the test device.
- Assign the new template and save.
- Run a debug connection test from the CLI:
cd /var/www/html/rconfigphp artisan rconfig:download-device {device-id} --debugThe --debug flag prints verbose output covering connection attempts, the authentication sequence, prompt recognition, command execution, and any errors or timeout events.
- Review the output for successful authentication, correct prompt recognition, complete command execution, and a clean disconnect.
- Adjust the prompt patterns, timeout values, command syntax, or privilege escalation as needed, then retest.
- Before production, test against multiple devices of the same type and over several connection cycles.
For full YAML key documentation and value formats, see the connection template legend, which documents every key rConfig reads along with its accepted values and defaults.
Why isn’t my template connecting?
Section titled “Why isn’t my template connecting?”Template problems usually show up as connection failures, authentication errors, or incomplete output. The tabs below cover the most common causes and fixes.
Symptoms: connections fail with timeout errors, downloads are incomplete, or success is intermittent.
Common causes: the timeout value is too low, network latency on WAN or VPN paths, an overloaded device responding slowly, or a prompt pattern mismatch that leaves rConfig waiting for a prompt that never matches.
Resolution:
- Increase the timeout incrementally (start with 5-second steps).
- Run with
--debugto observe actual response times. - Verify prompt patterns match the real device output.
- Extend timeouts for remote devices on high-latency paths.
- Check device CPU and memory during connection attempts.
# Original - too aggressivetimeout: 5
# Adjusted for WAN devicestimeout: 20Symptoms: login fails despite correct credentials, connection succeeds but authentication is rejected, or prompt recognition fails after login.
Common causes: username/password prompt patterns do not match the device, case mismatches, unexpected special characters in prompts, or insufficient privilege after authentication.
Resolution:
- Connect to the device manually and record the exact prompt text.
- Update the template prompt patterns to match precisely.
- Account for case sensitivity.
- Verify credential storage in the device configuration.
- Check privilege escalation commands if enable mode is required.
# Standard formatusername: "Username:"password: "Password:"
# Case variationsusername: "username:"password: "password:"
# Device-specific formatusername: "login:"password: "Enter password:"Symptoms: configuration retrieval stops mid-file, sections are missing, or responses are truncated.
Common causes: paging is not disabled, command output exceeds the timeout, buffer size limits, or mid-output text that matches the prompt pattern.
Resolution:
- Verify the paging disable command in the template.
- Increase the timeout for lengthy outputs.
- Check for prompt pattern false positives.
- Test with simplified commands to isolate the issue.
- Review the device’s paging control requirements.
# Cisco IOSpaging_command: "terminal length 0"
# Juniper JunOSpaging_command: "set cli screen-length 0"
# HP/Arubapaging_command: "no page"Symptoms: the template fails to save, connections fail immediately, or behaviour is unexpected.
Common causes: inconsistent indentation, unmatched or incorrect quotes, missing colons, trailing spaces, or tab characters instead of spaces.
Resolution:
- Run the template through a YAML validator.
- Check indentation is consistent (2 or 4 spaces).
- Confirm all quotes are paired.
- Replace any tab characters with spaces.
- Compare against a working template from the repository, modifying incrementally and testing after each change.
Common template parameters
Section titled “Common template parameters”| Parameter | Purpose | Typical values |
|---|---|---|
timeout | Connection timeout in seconds | 5-30 seconds |
username | Username prompt pattern | ”Username:”, “login:“ |
password | Password prompt pattern | ”Password:”, “password:“ |
prompt | CLI ready prompt pattern | Device-specific regex |
protocol | Connection protocol | SSH, Telnet |
paging_command | Disable output paging | Vendor-specific |
enable_password | Enable mode prompt | ”Password:“ |
enable_command | Privilege escalation | ”enable”, “en” |
Recommended timeout values by scenario
Section titled “Recommended timeout values by scenario”| Scenario | Recommended timeout | Rationale |
|---|---|---|
| LAN devices, modern hardware | 10-15 seconds | Fast network, responsive devices |
| WAN devices, remote locations | 20-30 seconds | Network latency considerations |
| Legacy equipment | 25-35 seconds | Slower device processing |
| Devices with large configs | 30-45 seconds | Extended output generation time |
| Test/development environment | 15 seconds | Balance speed and reliability |
Security considerations
Section titled “Security considerations”- Never embed credentials in template files. Use rConfig’s encrypted credential storage instead.
- Prefer SSH over Telnet wherever the device supports it.
- Use the minimum required privilege level, and enable mode only when a command needs it.
- Document vendor-specific quirks and security requirements in YAML comments.
Assign a template to a device
Section titled “Assign a template to a device”- Navigate to Inventory → Devices.
- Select the device to configure, or create a new device.
- Select the template from the Connection Template dropdown.
- Save the device configuration.
The assigned template controls all connection behaviour for that device, including configuration downloads and SNMP operations. Multiple devices can share one template for consistent behaviour across a fleet.
What’s next
Section titled “What’s next”- Add and manage devices to assign templates and run bulk operations.
- CLI commands for testing and debugging templates from the command line.
- Scheduled tasks to automate configuration downloads using your templates.